10 DIY Christmas Village Displays for Beginners
Save to Pinterest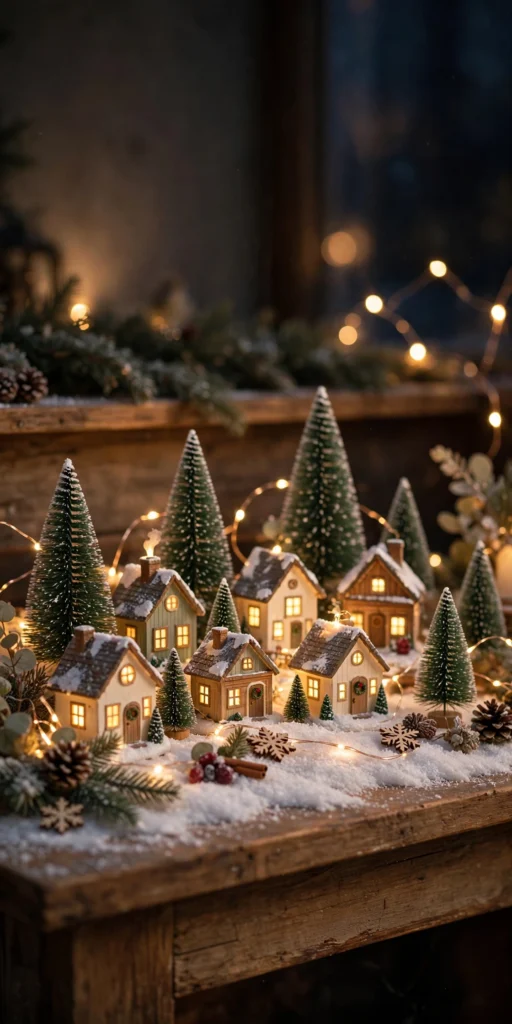
A Christmas village is one of those decorations that stops people in their tracks — a tiny glowing world tucked onto a mantel or tabletop. You don’t need a big collection or a big budget to start one. A few little houses, some snowy ground cover, and warm lights are enough, and you can add a piece or two each year. These beginner-friendly ideas will help you build a display that looks magical without feeling overwhelming.
1. The Classic Mantel Village
Line a few little houses along the mantel, tuck cotton batting or snow blanket underneath as snow, and weave a string of warm fairy lights behind them. The mantel’s height puts the village at eye level, and the glow against the wall looks wonderful in the evening.
2. Windowsill Winter Street
A deep windowsill makes a perfect ready-made shelf for a single row of houses. The window light adds daytime charm, and at night the lit windows of your tiny houses glow against the dark glass like a real street after snowfall.
3. Tiered Cake Stand Village
Stack a tiered cake stand or a set of sturdy boxes at different heights to create hills and levels. Placing houses on each tier gives your village depth and lets every building be seen, even in a small space.
4. Bookshelf Nook Village
Dedicate one shelf of a bookcase to your village, with books pushed to either side acting as a cozy backdrop. The enclosed shelf frames the scene like a diorama, and it’s safely out of the way of everyday traffic.
5. Under-the-Tree Village
Arrange your village around the base of the Christmas tree, with the tree itself as the village’s centerpiece. Add a train track or a winding path of fake snow, and the whole display feels like one connected winter world.
6. Sideboard Winter Scene
A sideboard or console table gives you a long, wide surface for a village that can stretch out. Keep taller houses and trees at the back and smaller pieces at the front so the whole scene reads clearly from across the room.
7. Glass Cloche Mini Village
Place one or two tiny houses, a bottle-brush tree, and a pinch of fake snow under a glass cloche or a large jar. It’s a charming miniature world in itself and a lovely way to start if you only have a couple of pieces.
8. Staircase Landing Display
If you have a wide landing or a sturdy step, use it as a hillside for your village, with houses stepping down the levels. The natural tiers make the scene feel like a real hillside town, and it’s a display guests notice as they move through the house.
9. Mirror Base Village
Set your village on a mirror or a mirrored tray so the lights and little windows reflect and double the glow. The reflection adds sparkle and makes even a small collection feel bigger and more magical.
10. Year-Round Starter Shelf
Begin with just three or four pieces on a small shelf and add one new house or accessory each Christmas. A slow-grown village feels personal and unhurried, and each piece carries the memory of the year you added it.
Closing Tips
Start small — three houses, a few trees, and snow cover are enough for a lovely first display. Stick to warm white lights for a classic glow, and keep cords tucked behind the display for a tidy look. Most importantly, leave a little empty space between pieces: a village with room to breathe looks far more realistic than one crammed edge to edge.
FAQ
How many pieces do I need to start a Christmas village?
Three or four houses plus a few trees and some snow cover are plenty for a charming first display — you can grow it over time.
What should I use for snow under a village?
White cotton batting, a snow blanket, or a white tablecloth all work well, and they can be shaped into gentle drifts around the houses.
Where is the best place to display a Christmas village?
Any stable surface away from heavy traffic works — mantels, sideboards, windowsills, and bookshelves are all popular choices.
How do I store a Christmas village after the holidays?
Wrap each house individually in tissue or bubble wrap, keep small accessories in labeled bags, and store everything in a sturdy box in a dry place.