15 DIY Holiday Cards to Make With Kids
Save to Pinterest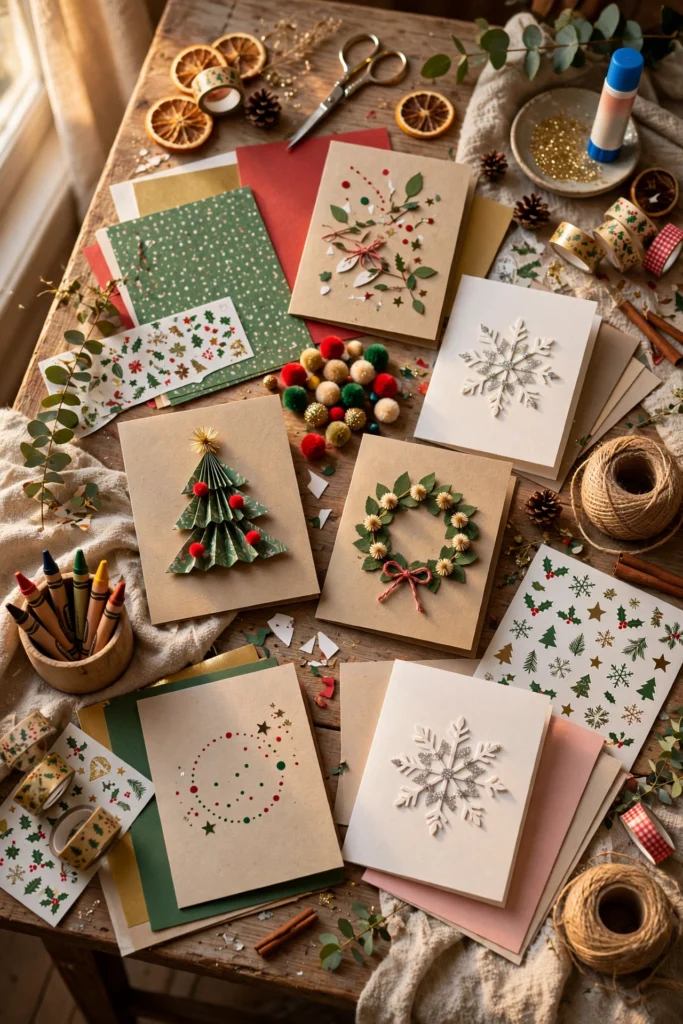
A handmade card from a child is the kind of mail grandparents keep forever. Card-making is also a perfect holiday activity: it’s creative, it’s wonderfully messy in the best way, and it produces something genuinely useful at the end. These fifteen ideas use simple supplies and easy techniques, so kids of different ages can all join in — and every card will look completely their own.
1. Fingerprint Christmas Tree
Children press green fingerprints in a triangle shape to build a tree, then add a star sticker on top and dot ornaments with a fingertip. It’s simple enough for toddlers and still charming when older kids add their own details.
2. Handprint Reindeer
Trace or paint a child’s handprint, then turn it into a reindeer with googly eyes, a red pom-pom nose, and drawn antlers. Add the child’s name and the year inside, and it becomes a keepsake as well as a card.
3. Pom-Pom Wreath Card
Kids glue small green pom-poms in a circle on the card front, then add a tiny bow and a few red pom-pom berries. The finished wreath is soft, textured, and looks far fancier than the effort it took.
4. Cotton Ball Snowman
Glue two or three cotton balls in a stack for a snowman, then draw or stick on eyes, a carrot nose, and a scarf. It’s a classic for a reason — soft, simple, and instantly recognizable as a snowman.
5. Striped Paper Tree
Cut strips of patterned or colored paper in decreasing lengths and glue them across the card like tree branches, finishing with a star. This one is great for practicing cutting skills and for using up pretty paper scraps.
6. Button Ornament Card
Draw simple ornament strings on the card, then let kids glue colorful buttons along them as baubles. The buttons add a lovely texture, and no two cards ever turn out the same.
7. Sponge-Painted Snowflakes
Dip a small sponge cut into a snowflake or star shape into white or silver paint and stamp it across dark card. The soft, snowy prints look beautiful, and stamping is easy for even the youngest crafters.
8. Washi Tape Tree
Tear or cut strips of washi tape in festive patterns and layer them into a tree shape on the card front. There’s no drying time, no mess, and kids love choosing their own tape combinations.
9. Thumbprint Light Garland
Kids press thumbprints along a drawn curvy line, then add tiny lines to turn each print into a glowing bulb. A row of colorful thumbprint lights is cheerful, personal, and quick to make in batches.
10. Paper Plate Snow Globe Card
Cut a circle window in the card front, glue a drawn winter scene behind it, and sprinkle in a little glitter before sealing the edges. Shaking the card makes the glitter swirl like snow — pure magic for the recipient.
11. Q-Tip Painted Snow Scene
Dip cotton swabs in white paint and dot falling snow over a painted night sky or a simple drawn scene. The dotting technique is relaxing and forgiving, and the finished snowfall looks genuinely lovely.
12. Felt Stocking Card
Cut a small stocking shape from felt, glue it to the card, and let kids decorate it with sequins, buttons, or tiny pom-poms. The soft felt adds a cozy, tactile touch that stands out in a pile of mail.
13. Pasta Snowflake Card
Glue small pasta shapes — stars, wheels, or bows — into snowflake patterns on the card, then paint them white or silver once dry. It’s an unexpected material that kids find hilarious and delightful.
14. Sticker Scene Card
For the youngest children, a blank card, a pack of holiday stickers, and a crayon-drawn background are all you need. Let them build their own winter scene freely — the joy is in the arranging, and the result is always full of personality.
15. Pop-Up Tree Card
Fold a card, cut simple slits, and push a paper tree shape forward so it pops up when the card opens. Older kids love the surprise factor, and recipients always smile at a card with a little hidden engineering.
Closing Tips
Set up a card-making station with all the supplies in one place, cover the table, and let kids make cards in batches — it’s easier than setting up and cleaning up for one card at a time. Write the recipient’s name on the back of each finished card before the pile grows, and keep a few extras blank for last-minute greetings. Most of all, don’t worry about perfection: the wobbly, glittery, gloriously handmade look is exactly what makes these cards special.
FAQ
What age can make these holiday cards?
Most of these ideas suit ages three and up with a little help, while pop-up trees and paper-strip trees are better for older children who can cut and fold confidently.
What basic supplies do I need for kid-made holiday cards?
Blank cards or folded cardstock, crayons or markers, glue, child-safe scissors, and a few fun extras like pom-poms, stickers, and glitter cover nearly every idea here.
How do I keep card-making from getting too messy?
Cover the table with newspaper or a plastic cloth, use washable paints and glue sticks where possible, and keep wet projects on a drying tray before stacking.
Can kids make cards in bulk for a whole class?
Yes — thumbprint lights, washi tape trees, and sticker scenes are all quick enough to make in batches, so a child can easily produce a stack for classmates.